¶ Project Zomboid: How to Increase Client Side RAM
If you're playing Project Zomboid with a lot of mods, it can be helpful to increase your ram on your PC to allow Project Zomboid to use up more ram. We recommend allocating more than the default 2GB. If you're running a heavily modded game, we recommend at least 4GB ram.
¶ Method 1: Via Steam Launch Parameters
¶ How To: Allocate more RAM to Project Zomboid
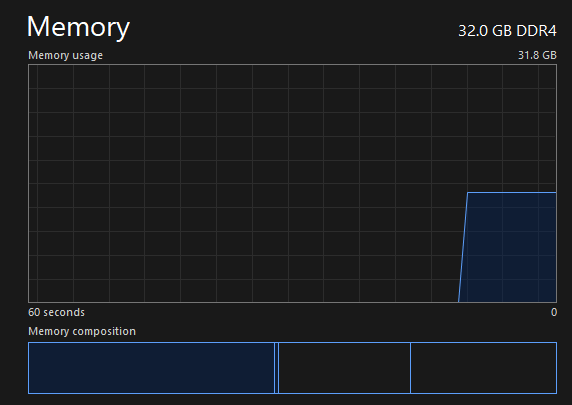
¶ Step 1: Check your PCs total ram
1. Open task manager
Right click the task bar and select Task Manager
2. Navigate to Performance
Here you will see the details of your computer and it's stats.
3. Make note of the number under Memory
Click on the memory tab and it will tell you the total memory (RAM) that your PC has
¶ Step 2: Allocate RAM to Zomboid
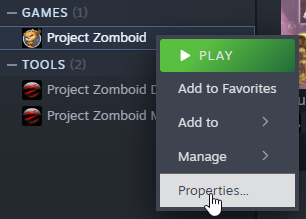
1. Open Zomboid Properties
Find Zomboid in your Steam Library and right-click it, then press the Properties option
2. Launch Options
On the general tab, there will be a text box where you can include start up parameters. This gives Zomboid instructions to load the game in a certain way.
3. Add the RAM parameters
Inside this box, add one of the following statements.
NOTE: Pick the option that makes the most sense for your total PC RAM. Do not exceed half of your total RAM or this can negatively impact PC performance.
-Xmx6144m -Xms6144m -- (6 GB RAM)
-Xmx8192m -Xms8192m -- (8GB RAM)
-Xmx12288m -Xms12288m -- (12GB RAM)
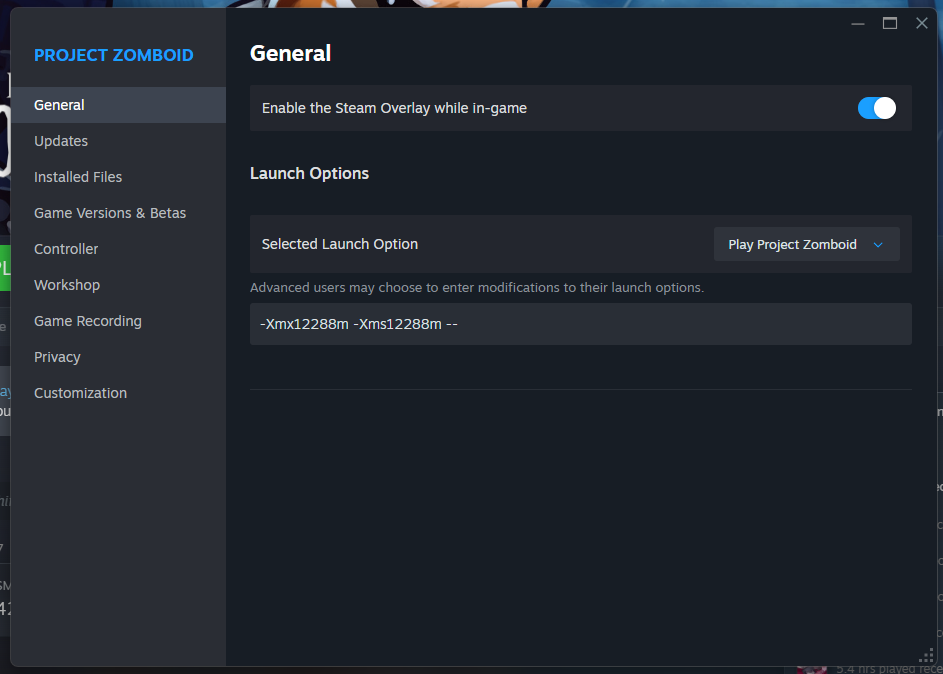
4. Close the properties box
¶ Step 3: Check RAM is allocated correctly
1. Navigate to C:\%USERPROFILE%\Zomboid in your file browser.
2. Start Project Zomboid through Steam
3. In the file browser tab you have, open the console.txt file
4. If RAM has assigned correctly, near the top of the console log there should be a line similar to shown below, which shows the amount of RAM you assigned.
LOG : General f:0> JVM (free: 416 Mb, max: 8192 Mb, total available: 510 Mb)
¶ All Done!
¶ Method 2: Manually
¶ Steps:
1. In Steam, right click Project Zomboid and click Properties
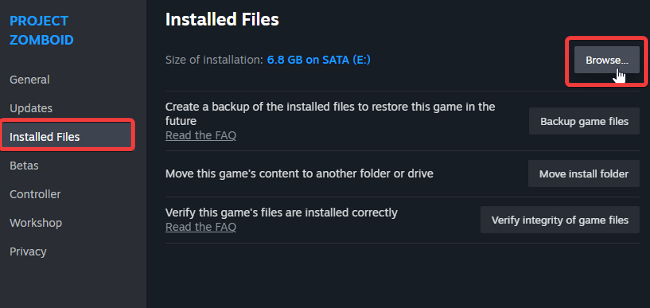
2. Click Installed Files, then Browse
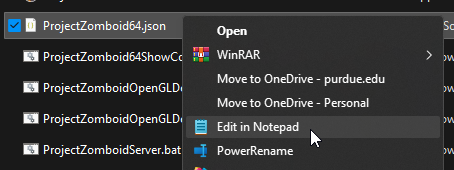
3. In the new window, find ProjectZomboid64.json and click Edit
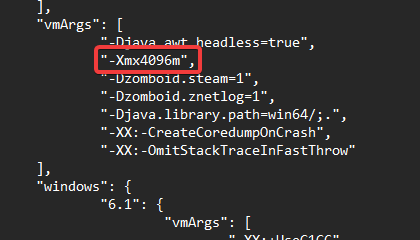
4. Use the following screenshot to set the ram. Here, we set it to 4096 for 4GB ram.
For higher values, you can use 5120 for 5GB, 8192 for 8GB and so on.
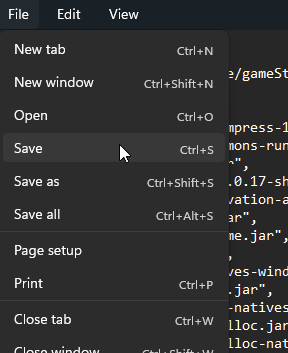
5. Save the file
6. When you start the game from now on, it will have more ram to use.