¶ V Rising: How to Set Up Voice Chat
V Rising servers have proximity voice chat that can be configured and enabled on your server by using Vivox Voice chat to create your own personal voice chat server. This guide will require careful attention to detail, so be sure to follow all of the steps accurately.
¶ Step 1: Set up a Unity Account and find your Voice Chat Info
1. Head over to Vivox VoiceChat and follow the prompts to create a Unity account.
2. Once you've logged in, you should see this menu in the top left:

2. Click on Products
3. Scroll down until you see Vivox Voice Chat and click it.

4. Follow the prompts and create a project.

5. Select Unity and click Next, Next, then Finish.

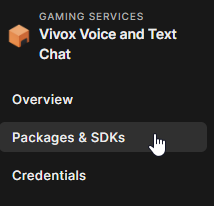
6. In the next screen, click Packages and SDKs.

7. Find Core Windows SDK and click Download SDK. Keep this file for future use.

8. Click Credentials

7. Make note of your Server, Domain, Token Issuer, and Token Key for future use.
¶ Step 2: Set up the Server
1. Open the File Manager

2. Navigate to /settings/
3. Right click any blank area and click New → File
4. Name the file ServerVoipSettings.json
5. Paste the following code into the file:
{
"VOIPEnabled": true,
"VOIPIssuer": "",
"VOIPSecret": "",
"VOIPVivoxDomain": "",
"VOIPAPIEndpoint": "https://unity.vivox.com/appconfig/",
"VOIPAppUserId": "",
"VOIPAppUserPwd": "",
"VOIPConversationalDistance": 14,
"VOIPAudibleDistance": 40,
"VOIPFadeIntensity": 2.0
}6. Fill in the file with the following information from the Credentials tab in Unity
VOIPIssuer - Token Issuer
VOIPSecret - Token Key
VOIPVivoxDomain - Domain
VOIPAPIEndPoint - Follow the link with the same as token issuer. https://unity.vivox.com/appconfig/<tokenissuer>
7. Save the file, then navigate to /VRisingServer/VRisingServer_Data/Plugins/
8. Extract the previously downloaded zip file on your PC, and navigate to \SDK\Libraries\Release\x64\
9. Upload vivoxsdk.dll to the server

10. Restart the server

¶ Step 3: Enable Voice Chat in V Rising
1. In V Rising, open the Options menu

2. Click Sound

3. Enable Use Voice Chat

You will now be able to use Voice Chat on your V Rising server