¶ How to Install Quilt on your Minecraft server
¶ What is Quilt?
Quilt is a fork of Fabric made by developers who want to make mod development easier for mod creators. Quilt is also currently a Fabric alternative, as all Fabric mods will work with Quilt for the time being. Using these steps you can install Quilt on your Minecraft server.
¶ How do I install Quilt on my PC?
Quilt makes it very easy to install on your computer. Simply go over to the official Quilt website and download the client version. Run the jar file and you'll see a menu to install Quilt. Select the version you want to use and click Install.

Once you've installed Quilt, you can open the Minecraft launcher normally. Now you'll see Quilt as an option. Just launch the game with Quilt selected and it'll open Minecraft normally with Quilt installed.

¶ Where do I put the Mods on my PC?
Similar for Forge and Fabric, Quilt just requires dropping the jar files into the Mods folder. Some mods only require installation on your computer while others may require that they also be installed on the server for other players to see the mod content. To find the mods folder on your computer, switch to the Installations tab in the Minecraft launcher and click the folder icon on Quilt.

You'll then see the folder for your Minecraft installation open, which will contain the mods folder. To install the mods, drag and drop your jar files into this folder.

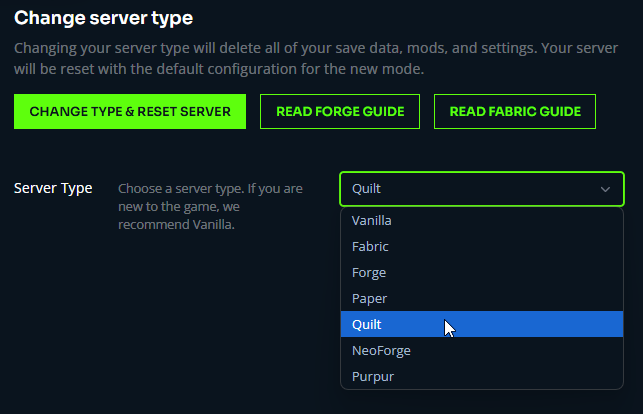
¶ How does Quilt work with my Minecraft Server?
You can install Quilt in the Change Server Type tab on the Control Panel.
Quilt should now be installed on your server. You should also now see a mods/ folder in the File Manager where you can place your jar files to install your mods. Once you put the mods on the server, go back to the control panel and restart the server. All players joining the server will need at least the mods that are on the server to connect. For step by step instructions, see our guide on installing mods.