¶ Project Zomboid: How to Automate your Mod Updates
Introduction
If you run a larger server or just want to do less maintenance on your server once you have your mods set up, you can use this guide to automate your mod updates for your server. Less work, more play.
Sound good? Read on.
***NOTE: WE NO LONGER USE UDDERLYUPTODATE, if you have it, please REMOVE IT.
As it has severe issues with our servers and often deletes SandBoxVars files.
How does it work?
Using our build in automated mod update through our Dashboard, all you have to do is toggle on the setting, and your server will from then on download updates for you, and restart the server to apply them.
How often does it check? Every 10 minutes. So your server can stay up to date with your players, even when IRL gets a bit busy; so you don't have to worry about a thing. Aah, sweet automation.
Important Notes:
The automatic update feature will need to restart your server for you when it updates your mods for you. But don't worry. It's not as rude as your local Zomboids and will issue restart warnings in the chat as the restart approaches so you have time to prepare. Neat.
¶ Steps:
1. Install your mods of choice for Project Zomboid, referencing the Mod ID and Workshop ID.
(We provide a Project Zomboid Mod Installation Guide here for your convenience if you need a refresher.)
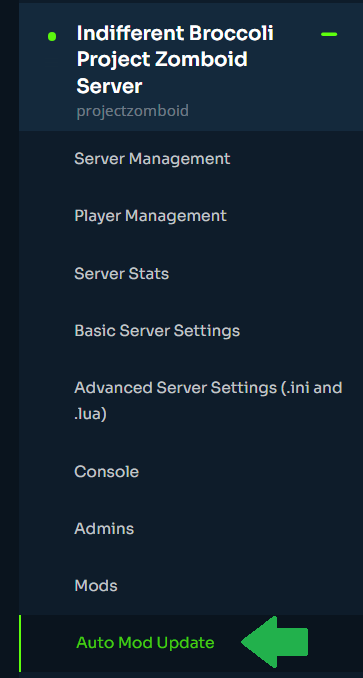
2. Next, you'll want to proceed to your Indifferent broccoli Dashboard, and locate the ‘Auto Mod Update' tab.
3. Once within, you'll want to find the toggle for ‘Autorestart on mod update’;
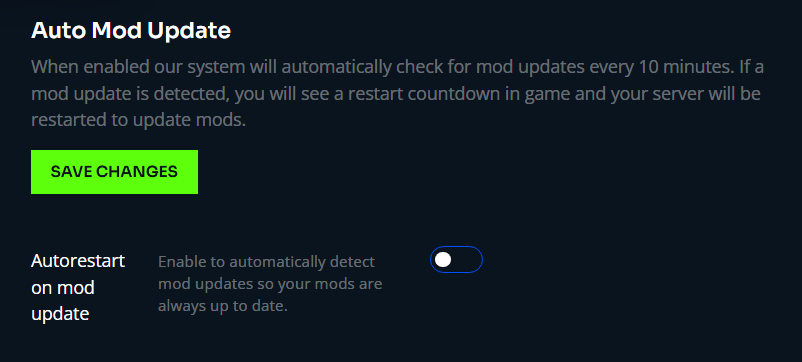
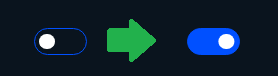
4. Turn the toggle to on, as seen below;
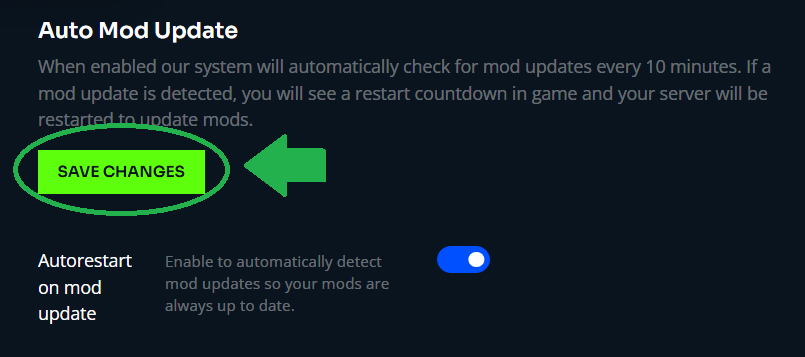
5. Hit the Save Config & Restart Server button, and wait for your server to start back up.
Congratulations, now your mods will always stay up to date, and instead of worrying about them? You can get back to destroying those Zomboids. Nice.