¶ How to Upload Settings Files to your Project Zomboid Server
If you have used our guide on uploading your save file, you may also want to upload your configs. Before we upload the configs, these are each of the files that will be needed if you want to transfer all of your mods and settings.
Note: The names of these files will vary based on your server name. The default name is servertest.
¶ servertest.ini
This file will be named after your server name. If your server name is indifferentbroccoli, the file will be called indifferentbroccoli.ini. This file contains some server settings as well as all of the IDs for the mods on the server. This is the most important file to transfer if you have mods installed.
¶ servertest_SandboxVars.lua
This file contains all of your settings and mod settings, such as the zombie population, zombie speed and much, much more. Make sure to include this file if you have special modded configurations for mods such as Brita's weapons.
¶ servertest_spawnregions.lua
This file is only required if you have custom spawnpoints set up or you have modded spawnpoints, such as a spawnpoint in Ravencreek. If you only use the default four vanilla spawnpoints, you will not need to upload this file. You also will not need to upload this file if you use custom coordinates.
¶ How to Upload Settings to your Server
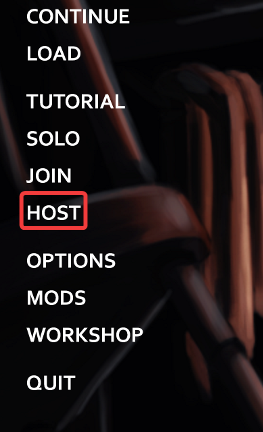
1. Ensure you are uploading from a local server using the Host button. If this is how you played, your files are ready to be uploaded.

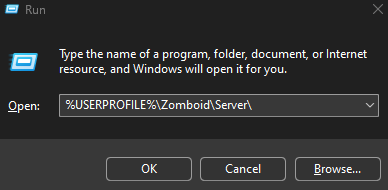
2. Press ⊞ Win + R on your keyboard and paste %USERPROFILE%\Zomboid\Server\ into the run box. Then, press OK.

3. Here, you will see the three config files described above.

4. Open the File Manager

5. Navigate to /server-data/Server/
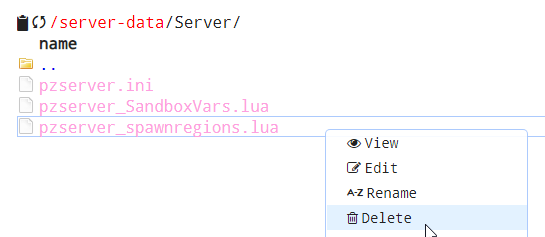
6. Delete all files in this folder.

7. Upload your three files from the previous steps.

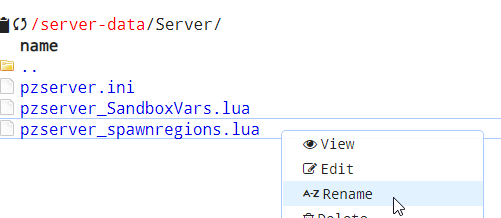
8. Rename these files to pzserver.ini, pzserver_SandboxVars.lua and pzserver_spawnregions.lua respectively.

9. Finally, follow our guide on configuring the ports in your ini file. Once this step is complete, all mods will download for the first time and configs will be set upon a server restart.